UPDATE: All THATCamp themes now come with a template that’ll automatically generate a Campers page. Just make a page called “Campers” or “Participants” or the like, then go into Edit or Quick Edit and set its template to “Campers.”
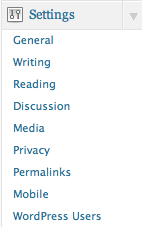
For those of you who are administering hosted THATCamp sites on thatcamp.org, I’ve just installed a plugin called “WordPress Users” that’ll let you create biography pages for people who have registered for your THATCamp and a “Campers” page that lists them all. It’s called “WordPress Users,” and it will work with any theme. When you activate it, the plugin will add a “WordPress Settings” choice to the “Settings” menu in your administration panel:

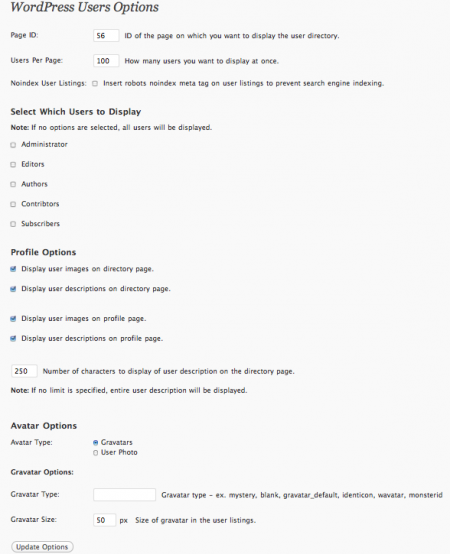
When you click on “WordPress Users,” you’ll be given a number of options that will let you configure how the profile pages and the “Campers” page look:
You’ll need to create a page called “Campers” or “Participants” or “Registrants” or something similar and enter its ID number on the screen pictured above to automatically generate a list of people who are registered for your THATCamp. To find the page’s ID number, click on “Pages” in the admin panel and hover over the title of the page you want to use as your Campers page. The URL will contain the ID number, listed as e.g. “post=56”.
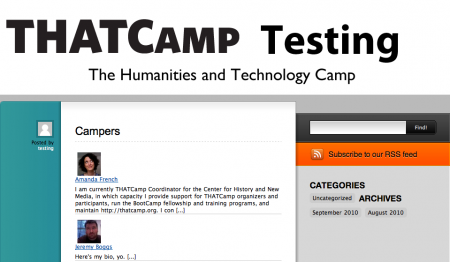
With the settings shown above, you’ll generate a “Campers” page that looks something like this (using the THATCamp Furvious theme — again, the plugin works with all themes):
You can play with the options till you’re happy with how it looks, and you can probably also change the look and feel a bit by using the already-installed “Edit CSS” plugin.
Happy camping! (It had to be said sometime.)


Note, too, that if you want to show camper pictures, you’ll need to make sure that Settings ==> Discussion to “Show avatars.” Remember that WordPress by default uses the Gravatar system at en.gravatar.com/, so users will need to go there to upload a picture.